
How to publish your availability
availability
Availability is key to your Delenta coaching profile. Once you've set up your profile and payment the next action to take is to set up your availability. This is how you would let your prospects, leads and existing clients know when you are available to meet them, so they can easily book your calendar through your Delenta profile page.
With Delenta's availability calendar you display when you are available for sessions this includes free discovery slots or introductory sessions which are what you would have with a lead or a prospect, as well as when you are free for your clients to book a paid session with you.
The article below explains how you set up your availability on your Delenta coach portal.
1. Setting up availability through the availability wizard for the first time
When you first enter the My Calendar area of your coach portal, if you are not connected to Zoom, you will first be asked to connect your zoom account with your Delenta account.
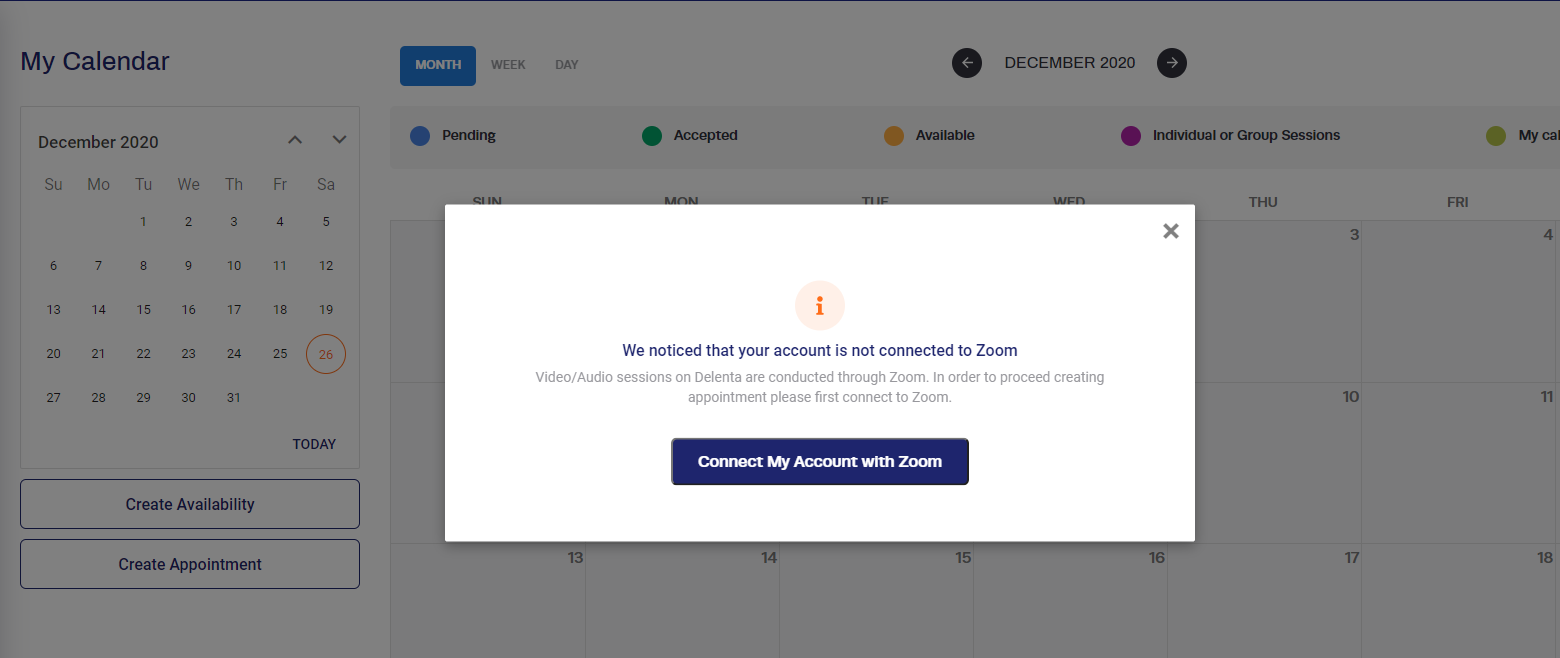
IMPORTANT: It is important that your Delenta account is connected with your zoom account as all your meetings on Delenta are conducted via Zoom. In order to make sure a valid unique zoom link is generated for your availability booking, it is important that you connect to Zoom prior to setting up your availability.
Once the Zoom connectivity is established, you will be taken through a simple set by step calendar availability creation wizard.
NOTE: Calendar wizard will only be displayed the first time you enter your My Calendar area. Once availability is set up through the wizard, if you require to make changes to your current availability, it will have to be done using the Calendar Settings area.
How to specify hours you are available daily:
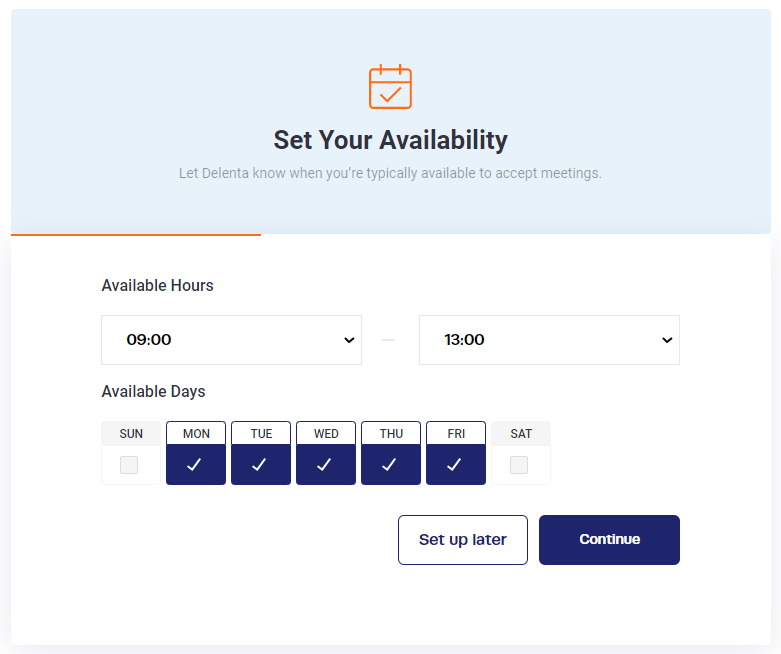
Specifying hours you are available daily is best done via the Delenta calendar wizard if you are using the My Calendar area for the first time or via the calendar settings area (See heading 2 below).
1. On each day you are available, enter the time you want to
Start accepting bookings, and
Stop accepting bookings.
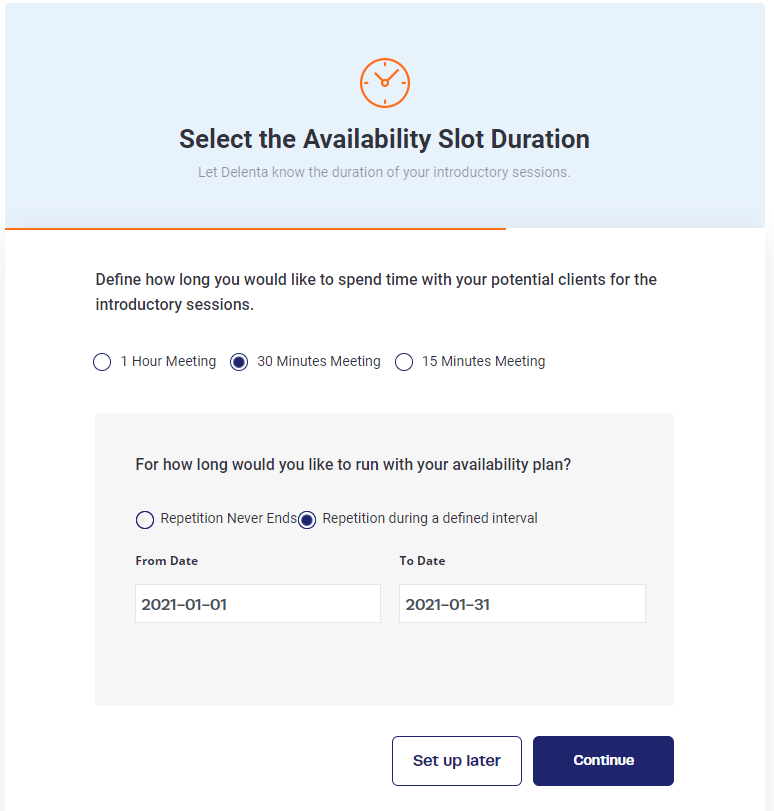
2. Define the duration of your availability for free discovery/introductory sessions. Also, specify the time period to apply this availability sequence.
Once you complete the wizard, Delenta will automatically save your entries on your availability calendar and display them on your profile landing page ready to take bookings.

2. Setting/Updating availability through calendar settings
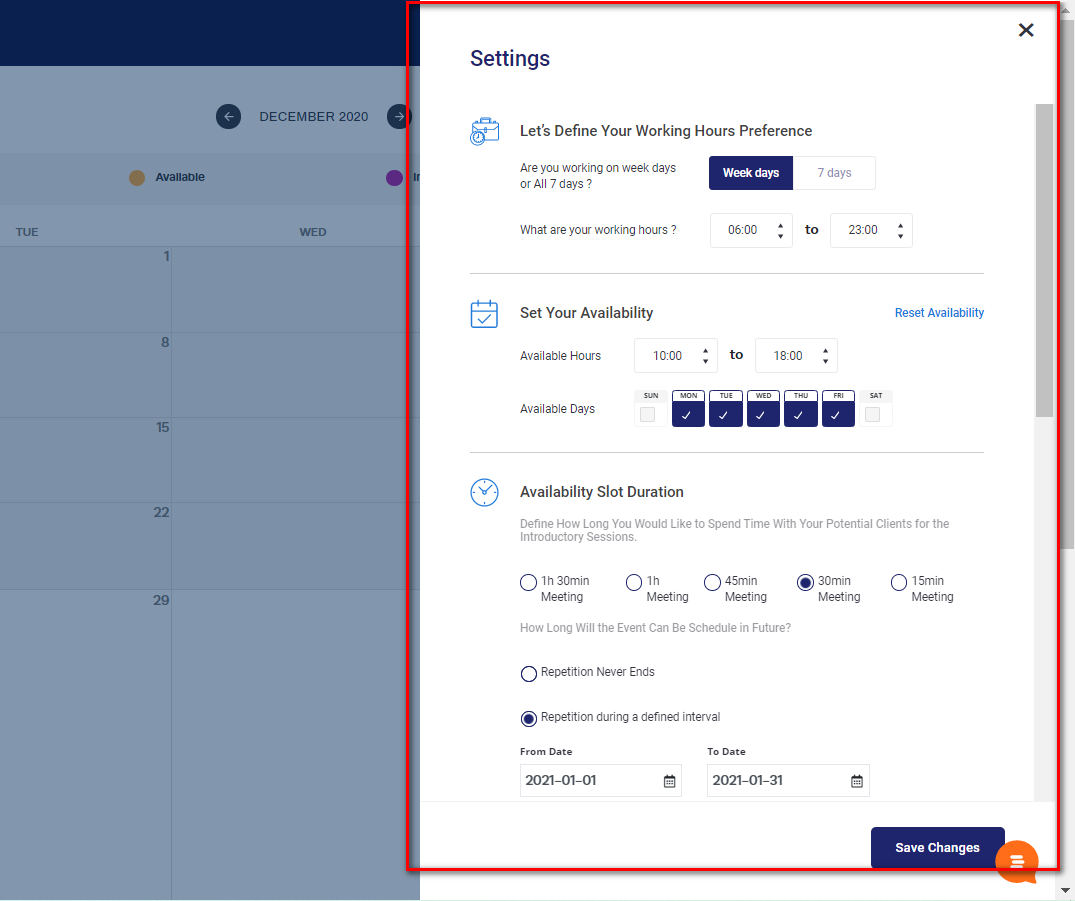
You can set up or update your current availability plan by using the calendar settings on My Calendar.
When you open the settings area, it will already highlight the selections you have made previously to record your availability. The image below shows my current availability plan is 10:00 am till 18:00 pm from Mon-Friday starting on 1st January 2020 and ending on 31st Jan 2020.
If I now want to change my current availability plan to 9:00 am - 13:00 pm from Mon-Wed starting on 1st January 2020 and ending on 31st Jan 2020, I would add these entries in the settings area as shown in the image below.
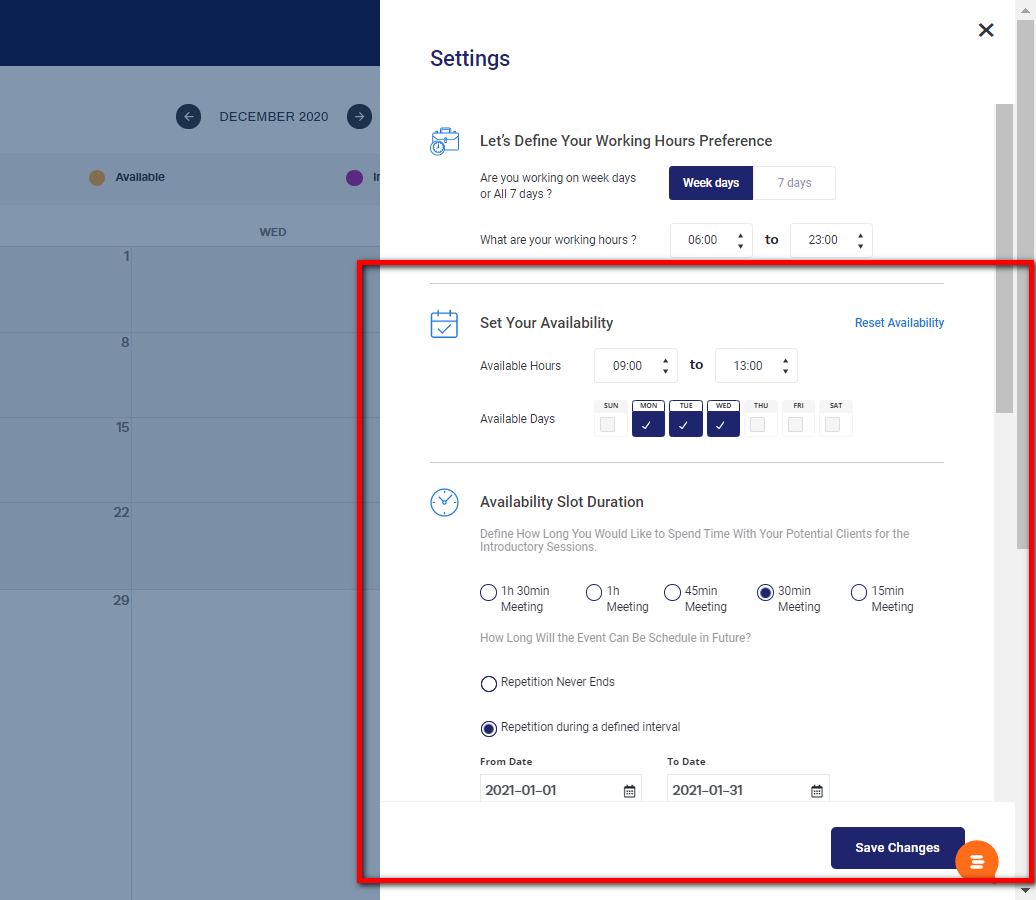
Don’t forget to save your changes.
Your previous availability plan will be replaced by the new availability plan and this will be automatically reflected on your profile landing page for people to book.
In Calendar Settings you can set buffer times for in-between appointments. This is for accepted appointments that your client has requested as part of their purchased coaching package.
You can also set your availability increment, which shows how frequently sessions will appear in your availability calendar for your clients to book. In the image below the coach has set their availability increment to 30 minutes which means that for clients, sessions slots appear every 30 minutes which can be seen in the image below.

3. Setting availability for specific dates within the calendar view
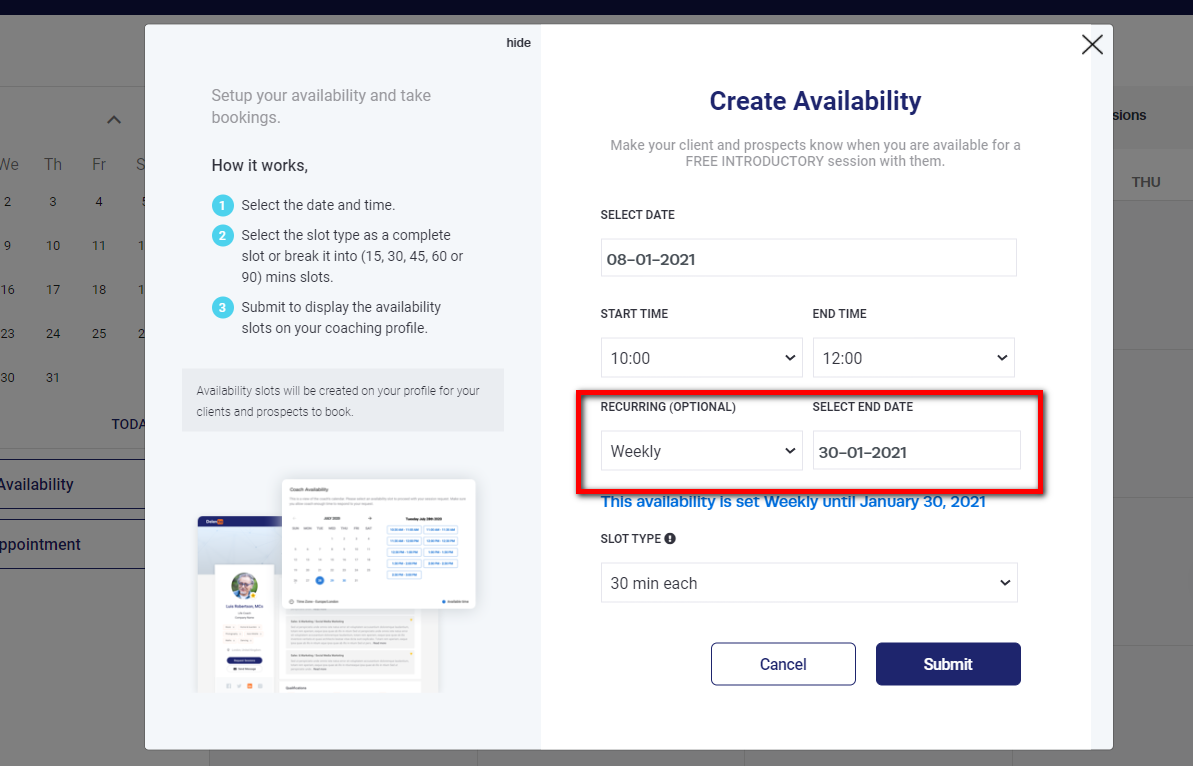
Step 1: Click on the Create Availability button on My Calendar page
Step 2: Select the date to apply the specific availability.
Step 3: To apply the same availability to recurring dates, select the recurring option with an end date. In the example shown in the image below, 10:00-12:00 am will be specified as available starting on 8th Jan 2021, recurring each week until the end 30th January 2021.
This availability sequence will be added in addition to any availability plans added via the availability wizard (See heading 1 above) or Calendar Settings (See heading 2 above).
How to add two or more availability plans.
You can create different events for different times of the week. In other words, you can create multiple availability plans using a combination of the Calendar Settings area and the Create Availability pop-up on My Calendar.
Let’s take an example to explain this functionality.
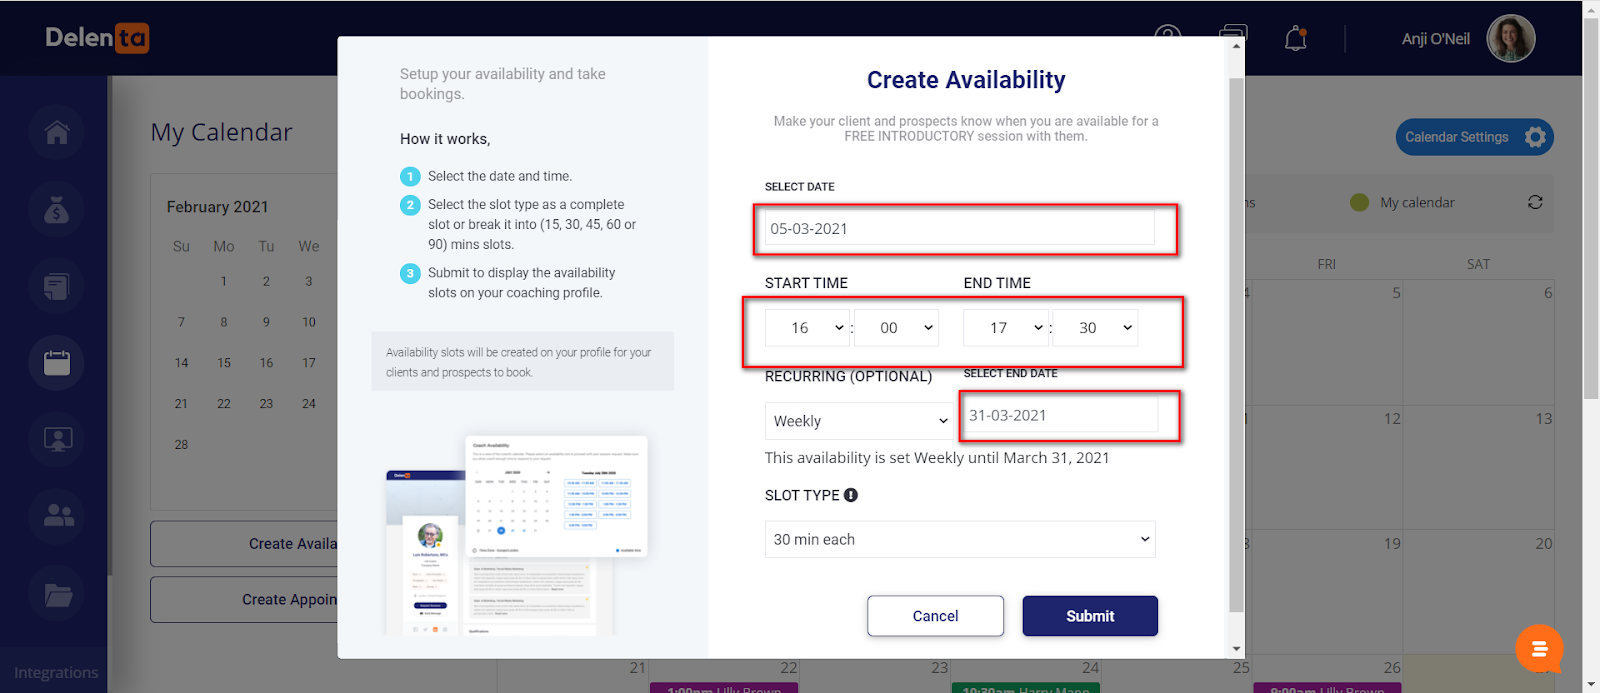
I want my Mondays- Wednesday availability to start from 9 am-1:00 pm each week starting from 1st January 2021 till the end of January 2021. On Thursdays, I don’t work therefore I am unavailable for bookings. On Fridays, I am available from 10:00-12:00pm each week starting from 8th January 2021 till 30th January 2021. Finally, I want my Friday 4:00-5:30 pm made available weekly starting 1st of March 2021 until the end of the month.
How this can be achieved in Delenta is explained below.
Step 1: Using the Calendar Settings area, I enter my regular Monday-Wednesday availability specifying start and end times, the duration and the recurring time period as shown in the image below.
Step 2: Since I don’t work on Thursdays, I will leave Thursday out completely.
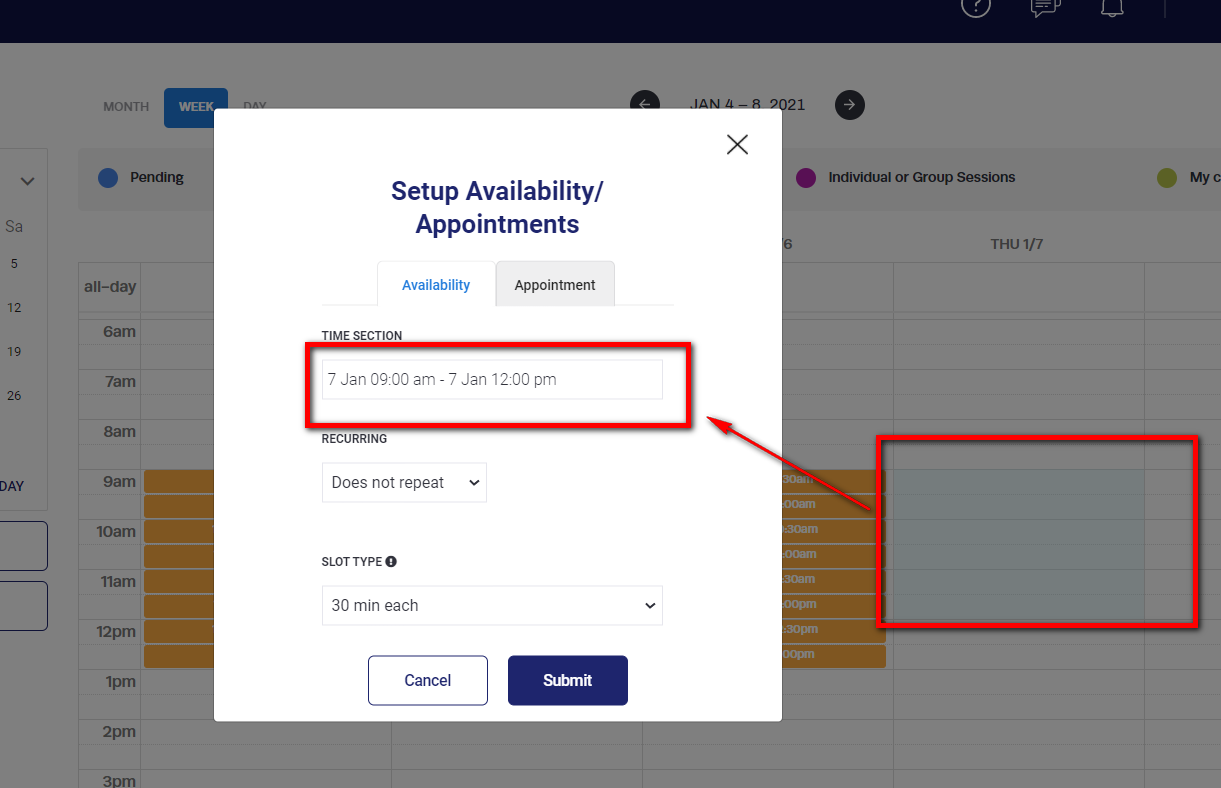
Step 3: I then go into setting up my second availability plan using the Create Availability pop-up within the calendar view as shown in the image below.
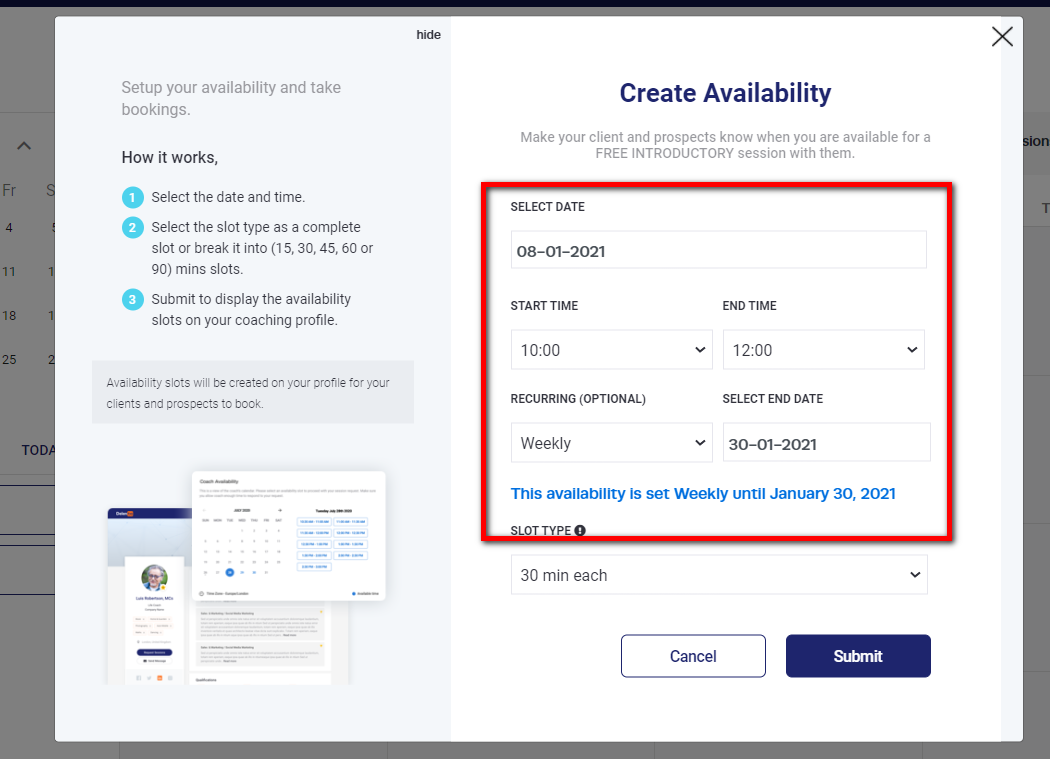
Step 4: For my 3rd set of availability, once again I use the Create Availability pop- up to create my Friday availability starting in March as shown in the screenshot below.
Delenta will automatically save all my availability plans - Monday-Wednesday plan, Friday Morning Plan and my Friday afternoon plan in March and make them available to take bookings via my Delenta profile landing page.
Tip: You can also select several time slots on the calendar by holding the mouse button down whilst scrolling and then release the mouse button a pop up is displayed with selected time selection.
4. Enable/Disable Same-Day Bookings
You can adjust your preferences for same-day bookings in Calendar Settings.
When same-day bookings are disabled, your availability for the day will not be displayed on your public profile or in your availability calendar for your clients or leads to request sessions so that you can avoid last-minute meetings.

Did this answer your question?